OAuth Client Management
OAuth Client Management allows system administrators to create and manage OAuth 2.0 clients used for machine-to-machine API authentication. This feature provides a secure way to provision API access credentials without using traditional API keys, with built-in secret rotation and expiration capabilities.
You must have the Super administrator role to access OAuth client management features. The "Manage OAuth Clients" button is only visible to users with Super administrator permissions.
When to Use This
Use OAuth client management when you need to:
- Enable machine-to-machine API authentication for integrations
- Provision secure API access credentials for external systems
- Manage API access lifecycle (create, rotate secrets, revoke access)
- Replace traditional API key management with OAuth 2.0 client credentials flow
This feature is particularly useful for:
- Integrating Breeze with external systems that require API access
- Setting up automated workflows that need authenticated API calls
- Managing API access for multiple integrations or services
Before You Start
- Ensure you have the Super administrator role assigned to your user account
- Have access to the user's profile in User Administration for the user you want to create OAuth clients for
Creating an OAuth Client
To create a new OAuth client for a tenant user:
- Navigate to Users page in Breeze
- Open the profile for the tenant user who needs API access in User Administration. The OAuth client management option is available within the profile.
- In the Actions section, click "Manage OAuth Clients" button
- In the OAuth client management drawer, click "Create OAuth Client" button
- Fill in the client creation form:
- Client Name (required): Enter a descriptive name that identifies the purpose of this OAuth client
- Description (optional): Add any additional context, notes, or information about how this client will be used
- Secret Expiration: Select the expiration period for the client secret (default: 180 days). Secrets expire automatically for security. You can rotate them before expiration to generate new ones.
- Click "Create" button
- In the secret display modal:
- Important: This secret will only be shown once. Make sure to copy it now.
- Copy the Client ID using the copy button next to the Client ID field
- Copy the Client Secret using the copy button next to the Client Secret field
- Store both values securely (they will be needed for API authentication)
- Check the "I have saved this secret securely" checkbox
- Click "Close" button to close the modal
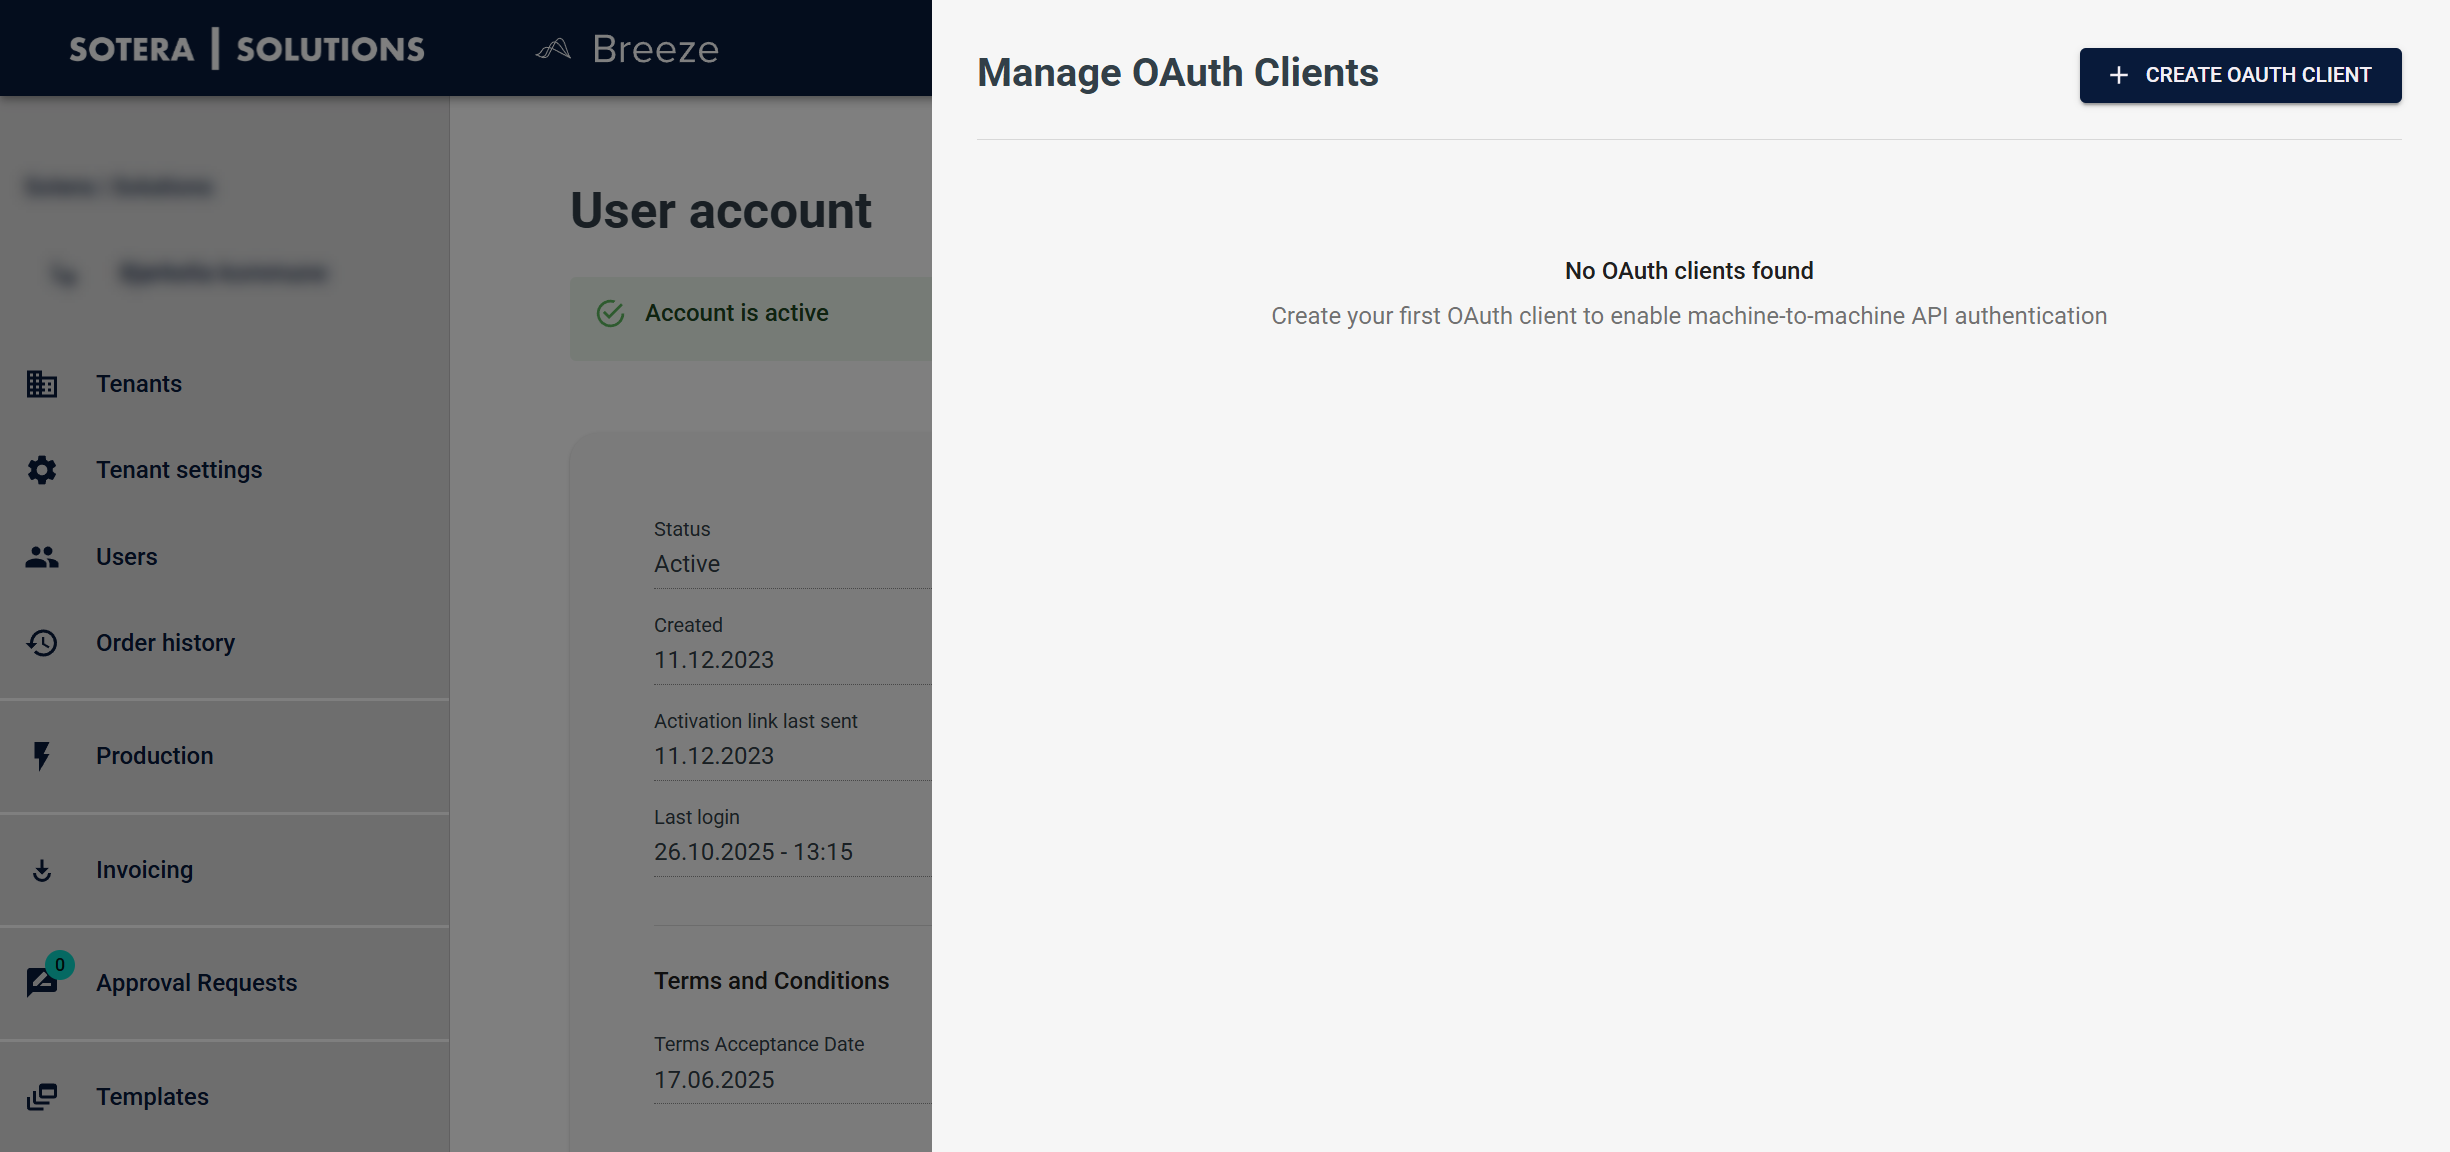
The OAuth client management drawer showing the empty state with the "Create OAuth Client" button visible.
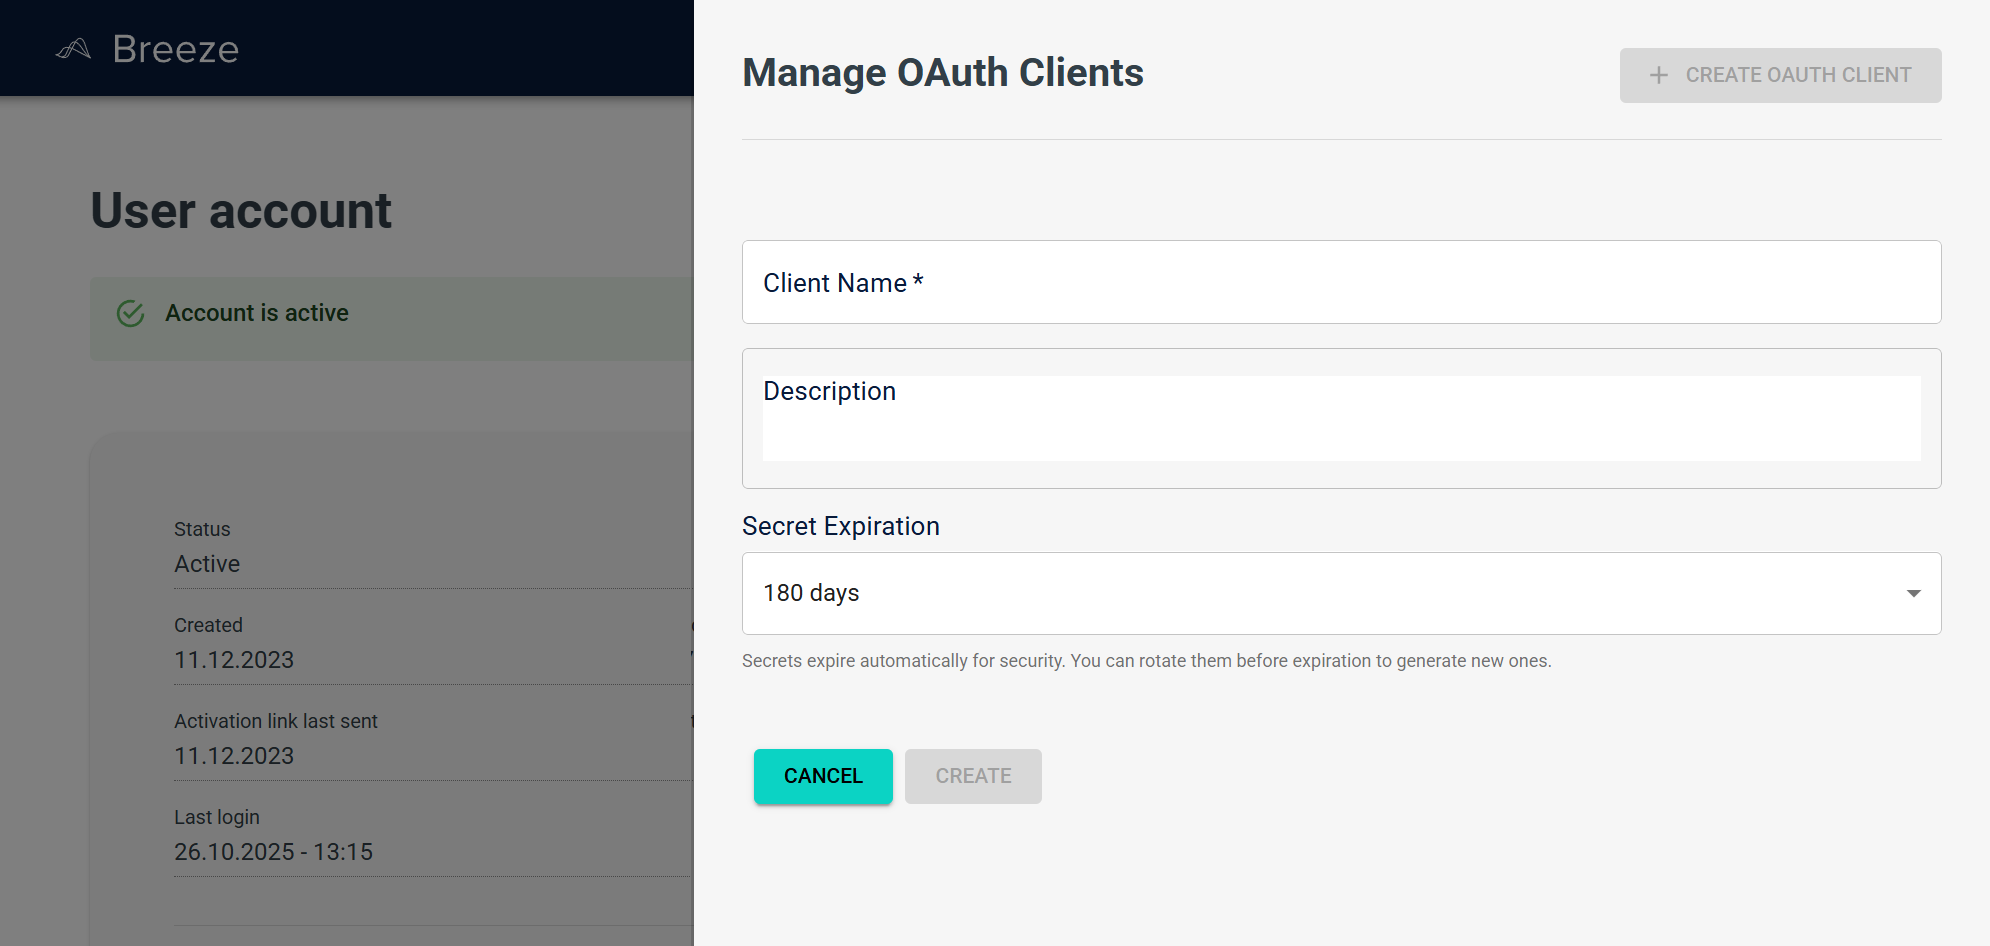
The create OAuth client form with fields for Client Name, Description, and Secret Expiration.
After creation, the new OAuth client appears in the client list with status "Active". The client secret cannot be retrieved again after the modal is closed, so ensure you save it securely.
Viewing and Managing OAuth Clients
The OAuth client management drawer displays all OAuth clients associated with the current tenant user.
Viewing the Client List
- Open the OAuth client management drawer from the user's profile in User Administration (see steps 1-3 in "Creating an OAuth Client")
- View the list of OAuth clients for the tenant user
The list shows the following information for each client:
- Client Name: The name you assigned when creating the client
- Client ID: The unique identifier for the OAuth client (truncated in the list view)
- Status: Current status (Active, Inactive, or Revoked)
- Created: Date when the client was created
- Last Used: Date when the client was last used for authentication (or "Never used")
- Expires At: Expiration information (e.g., "Expires in 180 days")
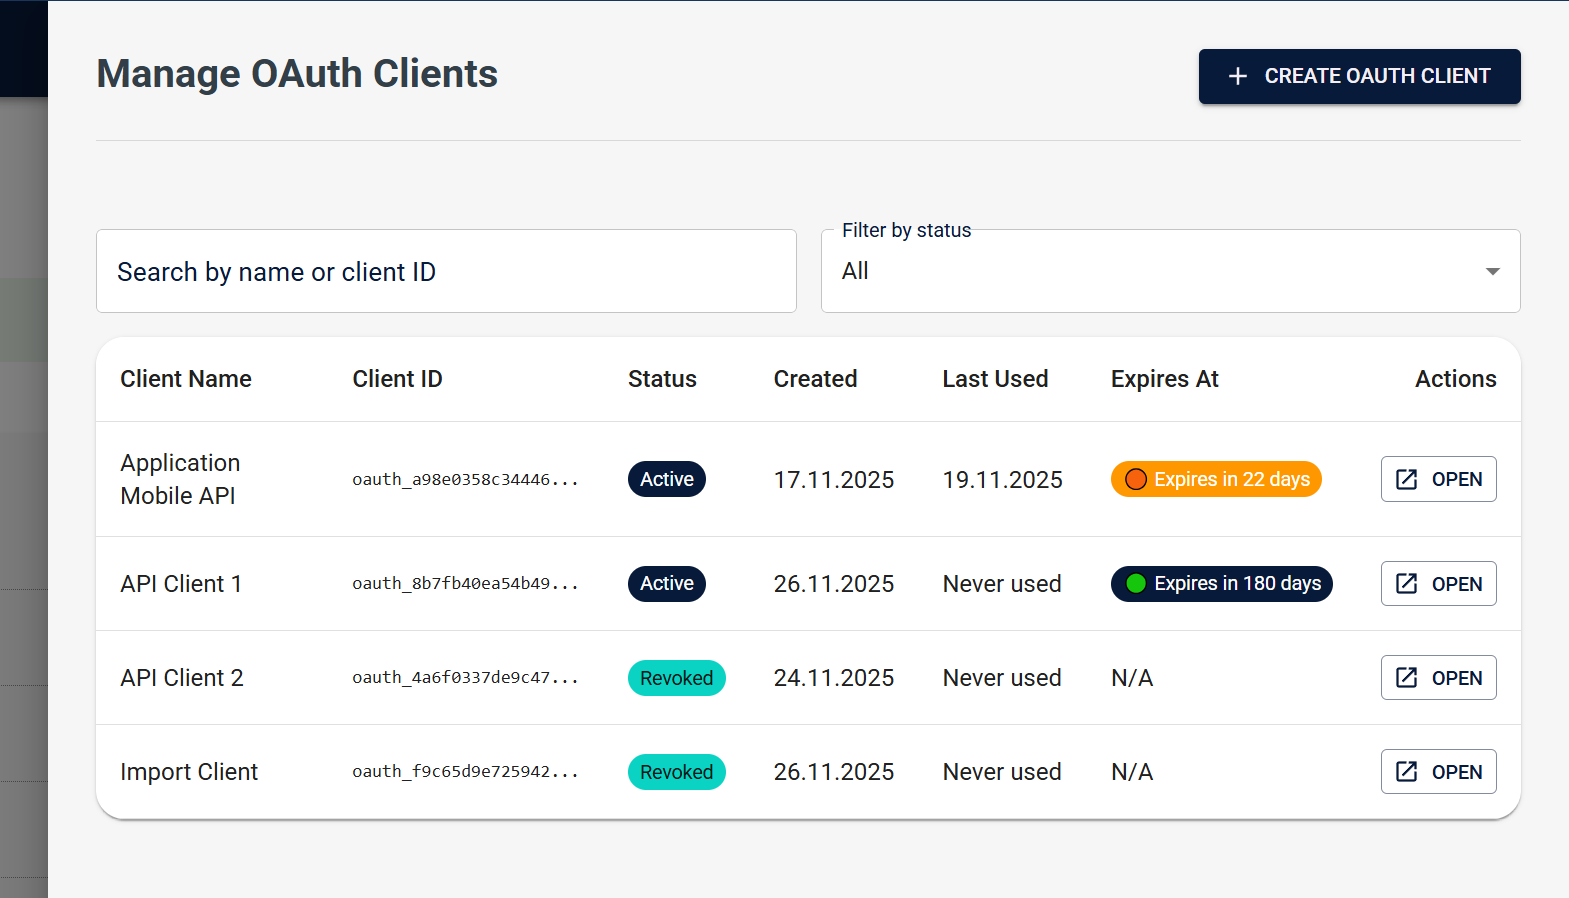
The OAuth client list showing created clients with search and filter options, including status badges and action buttons.
Searching and Filtering
- Search: Use the search field to filter clients by name or client ID
- Status Filter: Use the status filter dropdown to filter by status:
- All: Show all clients regardless of status
- Active: Show only active clients
- Inactive: Show only inactive clients
- Revoked: Show only revoked clients
Viewing Client Details
Click on a client row in the list to view detailed information about that client, including full client ID, description, scopes, and additional metadata.
Updating OAuth Client Details
You can update an existing OAuth client's information:
- Open the OAuth client management drawer from the user's profile in User Administration
- Click on an OAuth client in the list to view details
- Click "Edit" or similar action button
- Update the client information:
- Client name: Change the name to better reflect the client's purpose
- Description: Update or add description text
- Scopes: Modify the OAuth scopes associated with the client
- Status: Change status between Active and Inactive
- Save the changes
Changes are reflected immediately in the client list and detail view.
Rotating Client Secrets
Rotate a client secret when:
- The secret may have been compromised
- You want to refresh credentials for security best practices
- The secret is approaching expiration and you want to generate a new one
To rotate a client secret:
- Open the OAuth client management drawer from the user's profile in User Administration
- Select an OAuth client from the list
- Click "Rotate Secret" or similar action button
- Confirm the rotation action in the confirmation dialog
- In the secret display modal:
- Important: The new secret will only be shown once. Make sure to copy it now.
- Copy the new Client Secret using the copy button
- Store the new secret securely
- Check the "I have saved this secret securely" checkbox
- Click "Close" button to close the modal
Important: When you rotate a secret:
- The old secret is immediately invalidated and cannot be used for authentication
- Any integrations using the old secret will stop working until they are updated with the new secret
- The new secret is displayed once and cannot be retrieved again after the modal is closed
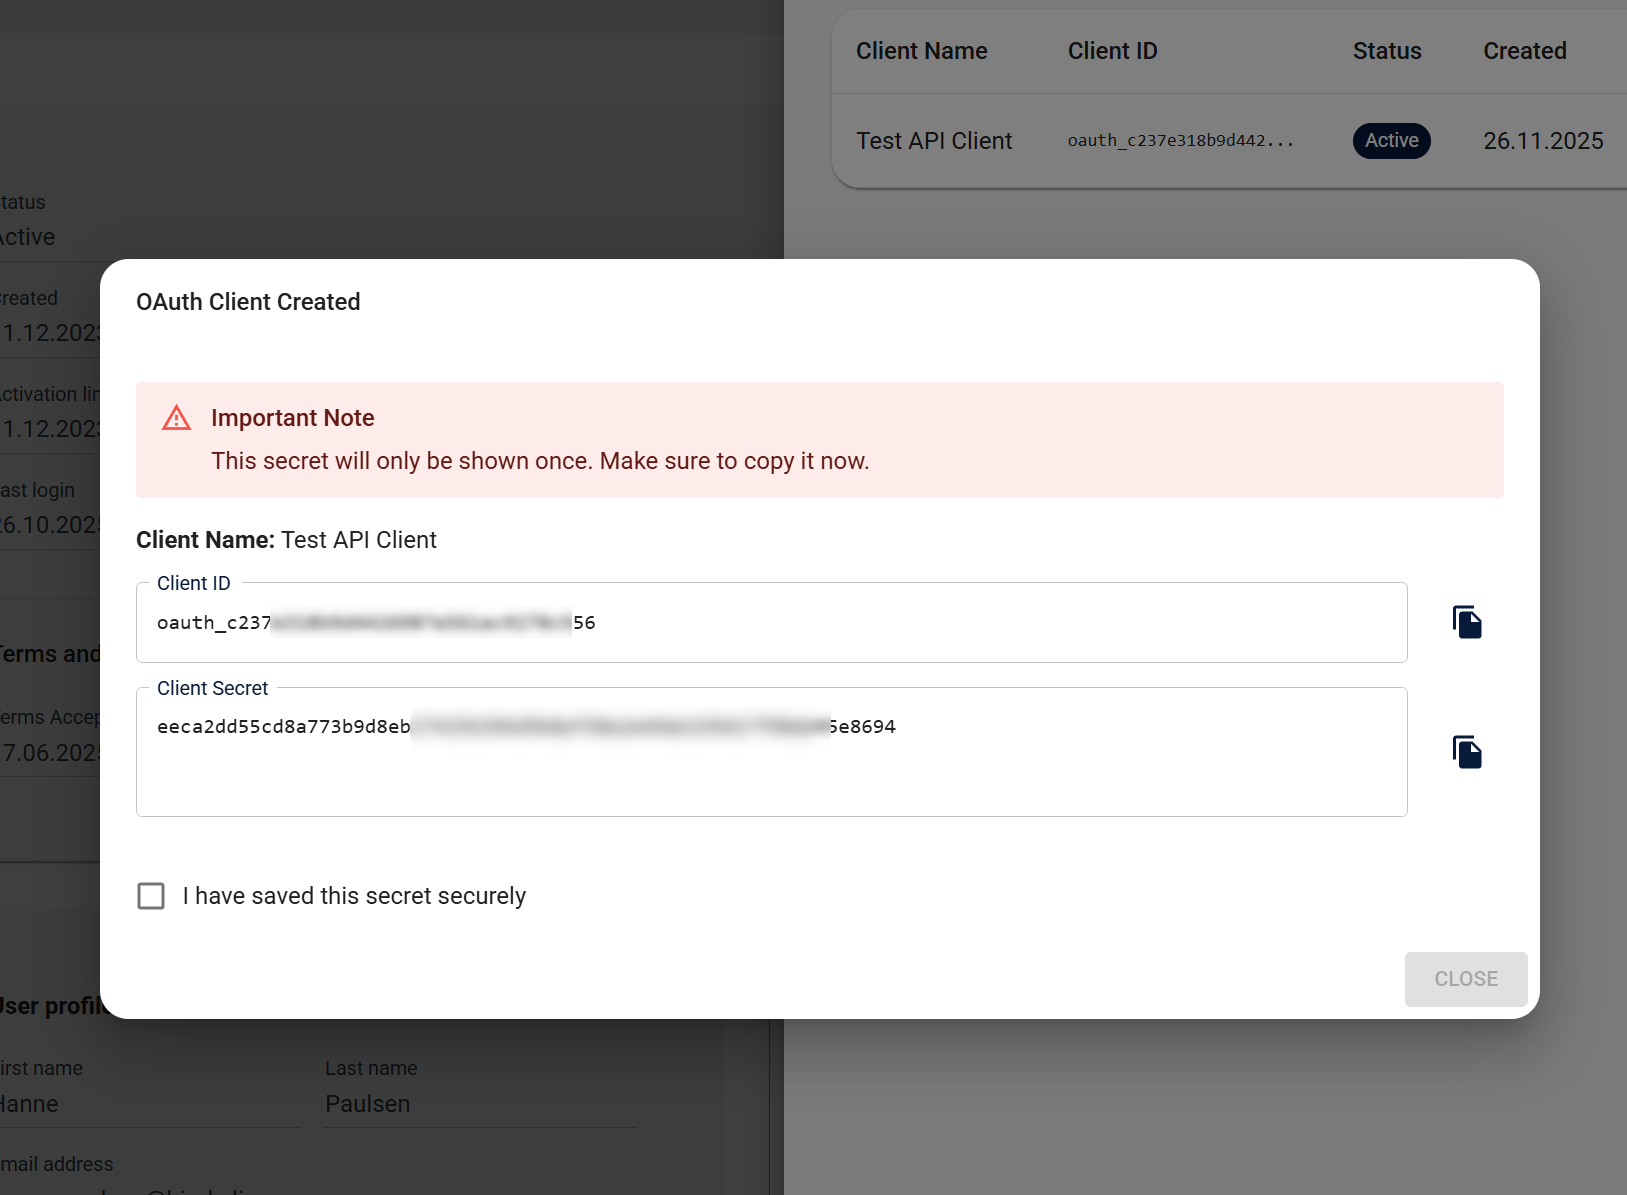
The secret display modal showing Client ID and Client Secret with copy buttons and the confirmation checkbox that must be checked before closing.
Revoking OAuth Clients
Revoke an OAuth client when:
- The client is no longer needed
- Access should be permanently disabled
- A security incident requires immediate access termination
To revoke an OAuth client:
- Open the OAuth client management drawer from the user's profile in User Administration
- Select an OAuth client from the list
- Click "Revoke" or similar action button
- Confirm the revocation action in the confirmation dialog
- Verify the client status changes to "Revoked"
Important: When you revoke a client:
- The client secret is immediately invalidated and cannot be used for authentication
- Any integrations using this client will stop working
- The client remains visible in the list but is marked as "Revoked"
- Revoked clients cannot be reactivated
Expiry Warning Emails
Breeze automatically sends email notifications before your OAuth client secrets expire. This helps prevent service disruptions by alerting you to rotate secrets proactively.
How It Works
The system sends up to 5 warning emails per client at these intervals:
- 30 days before expiry (if expiry is more than 30 days away)
- 14 days before expiry (if expiry is more than 14 days away)
- 7 days before expiry (if expiry is more than 7 days away)
- 1 day before expiry (if expiry is more than 1 day away)
- On expiry day (0 days before)
Smart Scheduling:
The system only sends warnings that are applicable. For example:
- If a client expires in 3 days, you'll receive the 1-day warning and the on-expiry warning
- If a client expires in 60 days, you'll receive all 5 warnings
Who Receives Warnings
Warning emails are sent to:
- User - The user account associated with the OAuth client (the account that determines permissions)
- Creator - The admin user who created the client (if different from the User)
If the User and Creator are the same person, only one email is sent.
Email Content
Each warning email includes:
- Subject: "Your OAuth Client Secret is Expiring Soon"
- Client Information: Client name and tenant name
- Expiration Details:
- Formatted expiration date
- Days remaining until expiration (or "expired" if on expiry day)
- Action Link: Direct link to OAuth client management page in the portal
- Localization: Available in multiple languages (English, Norwegian, Swedish, French, Finnish, Danish)
When Warnings Stop
Warnings are automatically disabled when:
- Client status changes to
inactive - Client status changes to
revoked - All warning stages have been sent
- Client secret is rotated (a new expiration date triggers a new warning schedule)
Best Practices
For Administrators:
- Monitor your email inbox for expiry warnings
- Rotate secrets promptly when warnings are received
- Don't wait until the last warning to rotate
- Verify email addresses for User/Creator are correct
- Check spam folders if warnings are not received
Troubleshooting Warnings
Not Receiving Warnings:
- Check that client status is
active(inactive/revoked clients don't receive warnings) - Verify User/Creator have valid email addresses
- Check spam/junk folders
- Contact your system administrator to verify the warning system is running
Receiving Too Many Warnings:
- This is normal - you'll receive up to 5 warnings per client
- Warnings stop automatically after all stages are sent
- Rotating the secret will reset the warning schedule
Warnings for Expired Clients:
- If a client expires, you'll receive the on-expiry warning
- Rotate the secret immediately to restore access
- A new expiration date will trigger a new warning schedule
Important Considerations
Secret Security
- One-time display: Client secrets are displayed only once after creation or rotation. They cannot be retrieved again after the modal is closed.
- Secure storage: Always store client secrets securely. Never commit them to version control or share them insecurely.
- Confirmation required: The secret display modal requires you to confirm that you have saved the secret securely before you can close it.
Secret Expiration
- Secrets expire automatically based on the expiration period set during creation (default: 180 days)
- You can rotate secrets before expiration to generate new ones
- Expired secrets cannot be used for authentication
- Monitor the "Expires At" column in the client list to track expiration dates
- Automatic email warnings are sent before expiration (30, 14, 7, 1 days before, and on expiry day)
- Respond to expiry warning emails promptly to avoid service disruption
Access Control
- Only users with
Super administratorrole can access OAuth client management - The "Manage OAuth Clients" button is only visible to
Super administrators - OAuth clients are associated with specific users
- Each user can have multiple OAuth clients
What's Next?
- Roles and Permissions - Learn about user roles and permissions in Breeze
- User Administration Overview - Explore other user administration features
- OAuth API Authentication - Learn how to use OAuth 2.0 clients for API authentication